The short answer: to split the screen on a Mac, open the Window menu, choose Move & Resize and pick Left, then do the same for the second window and pick Right. Or press Globe (fn) + Control + Left arrow, then the same with the Right arrow on the other window. Both windows stay on your desktop.
The other route, Window > Full Screen Tile, is the older Split View. It looks similar and behaves very differently. The rest of this page is what separates them.
Move & Resize
The menu bar stays and a third window is still behind. These are ordinary desktop windows, so a layout tool can save them.
Full Screen Tile
No menu bar, no desktop, nothing else here. This is a Space rather than a layout, which is why nothing can save it.
Route one: Move & Resize (ordinary windows)
Every window's Window menu carries a Move & Resize submenu (Apple documents these as tiled windows):
- Halves puts a window on the Left, Right, Top or Bottom of the screen. Keyboard: Globe (fn) + Control + the matching arrow key.
- Quarters puts it in a corner: Top Left, Top Right, Bottom Left, Bottom Right.
- Arrange does both windows at once. Left & Right takes the front window plus the one behind it and tiles them side by side in a single step. Keyboard: Globe (fn) + Control + Shift + arrow.
- Return to Previous Size undoes it. Keyboard: Globe (fn) + Control + R.
Dragging a window to the left or right edge of the screen does the same thing, if edge tiling is on in System Settings under Desktop & Dock (Apple's window tiling settings).
The important part: these are still normal desktop windows. Other windows sit behind them, you can put a third window on top, and Mission Control treats them like anything else.
Move & Resize, edge dragging and the Globe key shortcuts arrived in macOS Sequoia. On Sonoma and earlier, the only built-in split is the full-screen one below.
Route two: Full Screen Tile (this is Split View)
Choose Window > Full Screen Tile, or hover the green button and pick a tile option, and macOS asks you to click a second window (Apple calls this Split View). The two then share the screen with no menu bar and no desktop behind them.
This is not a bigger version of route one. macOS has moved those two windows into a new full-screen Space of their own. Swipe left or right with four fingers, or press Control and an arrow key, and you leave that Space entirely. Your desktop, with all its other windows, is somewhere else.
Getting out of a split
From Move & Resize, drag a window by its title bar, or use Return to Previous Size. From Full Screen Tile, move the pointer to the top of the screen so the menu bar drops down, then click the green button on either window. One window returns to the desktop and the other stays full screen until you do the same to it.
Splitting three or four ways
Full Screen Tile holds exactly two windows. That is the feature's design and there is no setting that changes it.
Move & Resize goes further: Quarters places four windows in the four corners, and the Arrange options combine a half with two quarters (Left & Quarters, Top & Quarters, and so on) for a three-window layout in one step.
Quarters
Four windows, one in each corner. Pick each corner in turn from the Move & Resize submenu.
Left & Quarters
A half beside two quarters, placed in a single step. These are the Arrange options.
Split screen with an external monitor
Both routes work per display. A split belongs to the screen it was made on, so you can run a pair on the laptop display and another pair on an external monitor at the same time.
What neither route does is remember. Unplug the monitor and the windows that lived there crowd onto the display you have left. Plug it back in and they stay where they crowded. If that is your actual problem, windows rearranging on an external monitor covers it directly, and window management across multiple monitors covers the wider setup.
Docked
A split on the external display, another on the laptop. Each belongs to the screen it was made on.
Unplugged
Everything crowds onto the display you have left, and plugging the monitor back in does not undo it.
Why the green button will not split for some apps
A window can only be tiled if it can be resized. Fixed-size windows, most preference windows, and many dialogs cannot, so macOS offers them nothing. Some older apps also decline full-screen mode entirely, which removes the Full Screen Tile option while leaving Move & Resize available.
Third-party split-screen tools
If the built-in routes are not enough, or you are on Sonoma and want halves without going full screen, the established tools all handle it well. They mostly differ in how you trigger them:
- Rectangle is free and open source, driven entirely by keyboard shortcuts (how it compares).
- Magnet does the same job with drag-to-edge zones and a menu bar icon (how it compares).
- Moom adds a grid popover on the green button, plus saved snapshots you replay by hand (how it compares).
- BetterSnapTool lets you draw your own snap areas and assign shortcuts to them (how it compares).
- Spectacle is no longer maintained, so its users are usually looking for somewhere to move (how it compares).
Every one of them is faster than the menus above, and each is a genuinely good tool. They also all share one property: they place a window the moment you ask, and not before. Our comparison of the best Mac window managers goes through the field properly.
Stage Manager is not split screen
Stage Manager groups windows and parks the rest in a strip down the side. It shows you one set at a time, but it does not size or position anything into halves. You can run it alongside Move & Resize; with Full Screen Tile there is nothing for it to manage, because a full-screen Space has no strip.
What none of this survives
Neither route remembers anything. Both are things you do to the windows in front of you, right now:
- Change your displays and the arrangement is gone.
- Quit an app and its half is gone. Reopen it and it lands wherever it last felt like.
- There is no way to name a split, save it, or ask for it back tomorrow morning.
And a Split View pair is a Space, not a layout. That distinction is why nothing on the Mac can save one, and that includes Workflo. Tools that restore window layouts read the windows on the Space you are looking at. A full-screen pair is not on that Space, so there is nothing for them to record. This is not a gap someone will close in a future version. It follows from what Split View is.
Move & Resize is the opposite case. Those are ordinary desktop windows in ordinary positions, which means a layout tool can read them, save them and put them back.
The side by side that comes back
If you want two windows side by side and you want them there again tomorrow, build the split with Move & Resize rather than Full Screen Tile, and let something remember it.
That is what Workflo does. It learns your window layout for every display setup on its own, so when you dock, undock or wake the Mac, everything snaps back where it belongs. It also goes a step past remembering: a Scene opens the apps that are not running, places every window, and clears the rest, and it can apply on its own before a call or at the start of your workday rather than waiting for you to ask.
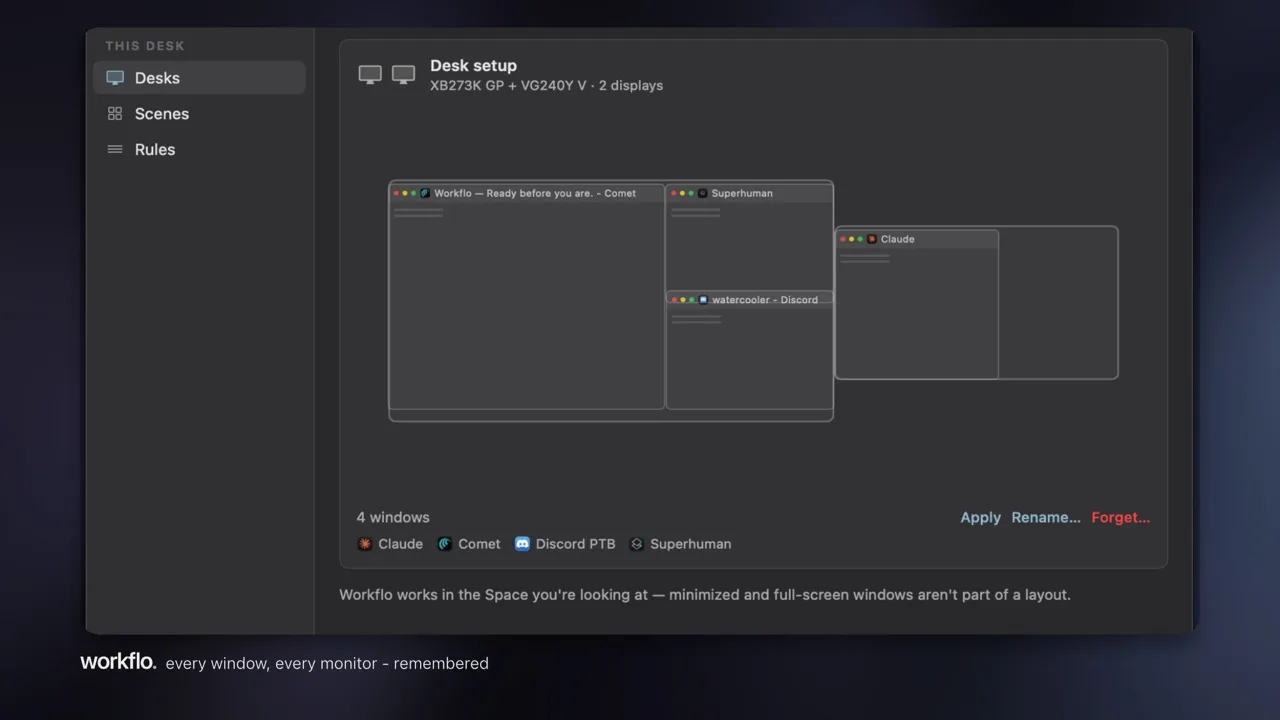
So the pair you tile by hand this morning is not something you rebuild after lunch, or after a monitor unplug, or tomorrow. Workflo runs on Accessibility permission alone and never asks for Screen Recording, so it cannot see what is inside those windows, only where they sit.
Tile it once. Have it back every time.
Try Workflo free for 7 days →